Class 5: Programmable Electronics
The first part of the assignment for this class was to program a microcontroller to produce an output using at least one button for input while including a conditional statement and a for loop. We had worked with using a button to dim LED's in breakout rooms the previous day, so I decided to expand upon that and give it my own twist. I decided to have one LED performing a task if the button wasn't pressed, and the other LED performing a task if the button was pressed. I ended up programming the LED's so that, if the button was pressed, a red LED would brighten over 2.5 seconds and then dim over 2.5 seconds. Otherwise, a green LED would dim over 2.5 seconds. The code for this can be seen below.
      void loop() {
        // read the state of the pushbutton value:
        buttonState = digitalRead(buttonPin);

        // check if the pushbutton is pressed. If it is, the buttonState is HIGH:
        if (buttonState == HIGH) {
          // If the button is pressed, brighten the second (red) LED over 2.5 seconds then dim it over 2.5 seconds
          for (int i = 0; i <= 250; i+= 1) {
            analogWrite(PWMpin1, i);  //Second LED gets brighter
            delay(10);
          }

          for (int i = 250; i >= 0; i-= 1) {
            analogWrite(PWMpin1, i);  //First LED gets brighter
            delay(10);
          }
        }

        // If the button isn't pressed, dim the first (green) LED over 2.5 seconds
        else {
          for (int i = 250; i >= 0; i-= 1) {
            analogWrite(PWMpin2, i);  //First LED gets brighter
            delay(10);
          }
        }
      }
The result of this code and the circuit looked like this:
I learned a lot more about the Arduino code through doing this first exploration. I found that you cant press the button while the green LED is in the process of dimming because the loop() hasn't restarted and therefore isn't looking to see if the button is pressed. Instead, I found that holding the button while the green LED is dimming works best, as it senses that the button is pressed as soon as it exits the green LED's for loop.
The second part of the assignment was to find a tutorial for making 3D objects in Fusion360 and create a simple 3D model. I watched a tutorial about designing a 3D printed enclosure for the Arduino Uno. I then alwas wathced another tutorial about designing a 3D printed lampshade. Wanting to do more and make sure I had a good grasp on the concepts and tools, I followed along with the lampshade tutorial. I learned a lot throughout the tutorial, and feel much better working in 3D with Fusion 360. Throughout the tutorial, I learned:
- How to use the spline tool to make curved lines
- How to use the revolve tool to rotate a sketch around an axis. In this case, it was rotating the general shape for the outside of the lampshade around the y-axis to create the full lampshade shape.
- How to use the offset plane and split body tools to separate different parts of the lampshade and only apply a specific design to the necessary sections
- How to use extrude (to) to extrude to a certain surface instead of a set amount, helpful for cutting holes as deep as a specific section of a body
- How to use the project tool to create the exact dimensions of a body in a new sketch
- How to use 'Edit Feature' on the bottom timeline to edit certain steps of the design
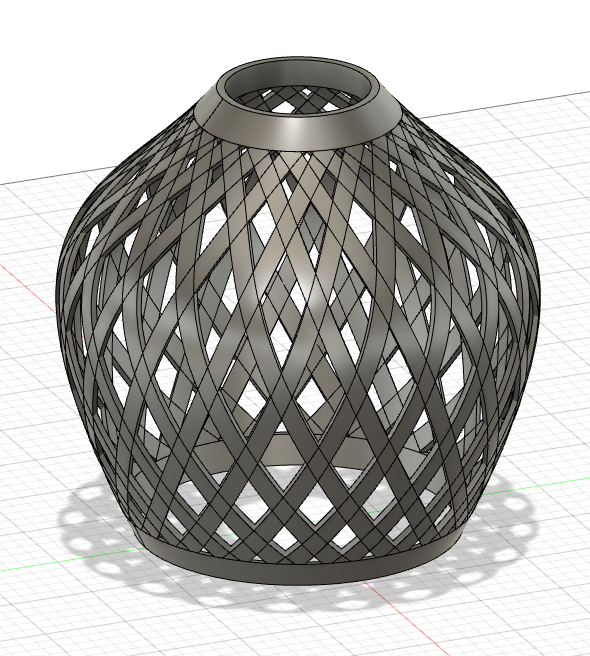
I really like how the finished design turned out. It looked like this:
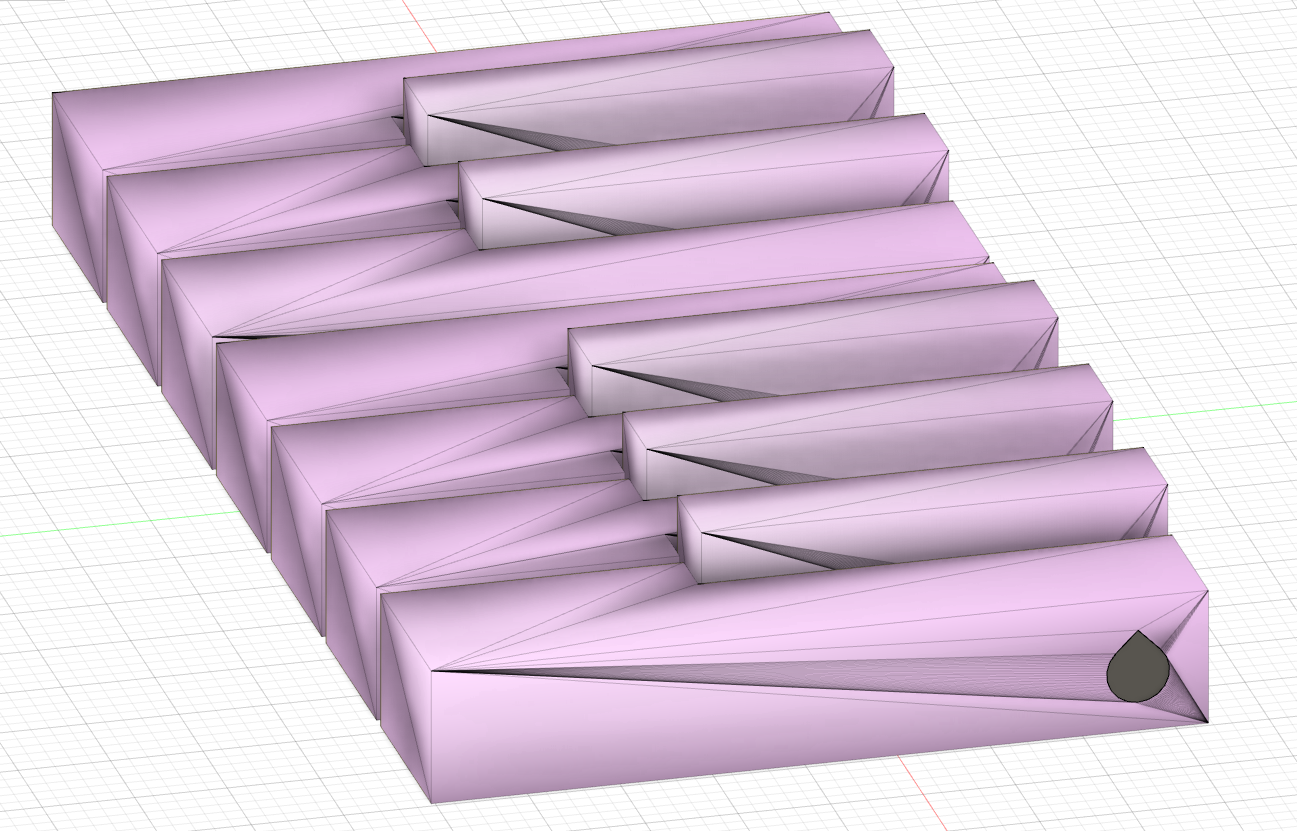
The third and final part of this assignment was to think about our final project, specifically about anyadditional components I'll need. For my final project, I'm making a piano that uses copper wire to play each note. I learned about Thingiverse and how I could use it to obtain a 3D model of keys instead making them myself, allowing me to focus on the more important parts of my project. I found a set of keys on Thingiverse that I'm going to 3D print, but there's a hole in each key. In Fusion 360, I modeled a rod to go through the keyboard to keep each key together. It looks like this: