Class 10: Machine Building
The assignment for this class was to make a machine that is controlled from a computer or phone using at least one stepper motor. I decided to make a car using two stepper motors to drive the front wheels. I'm going to split this documentation into four sections because there's a ton of information and troubleshooting that went into this assignment.
Section 1: Building the Car
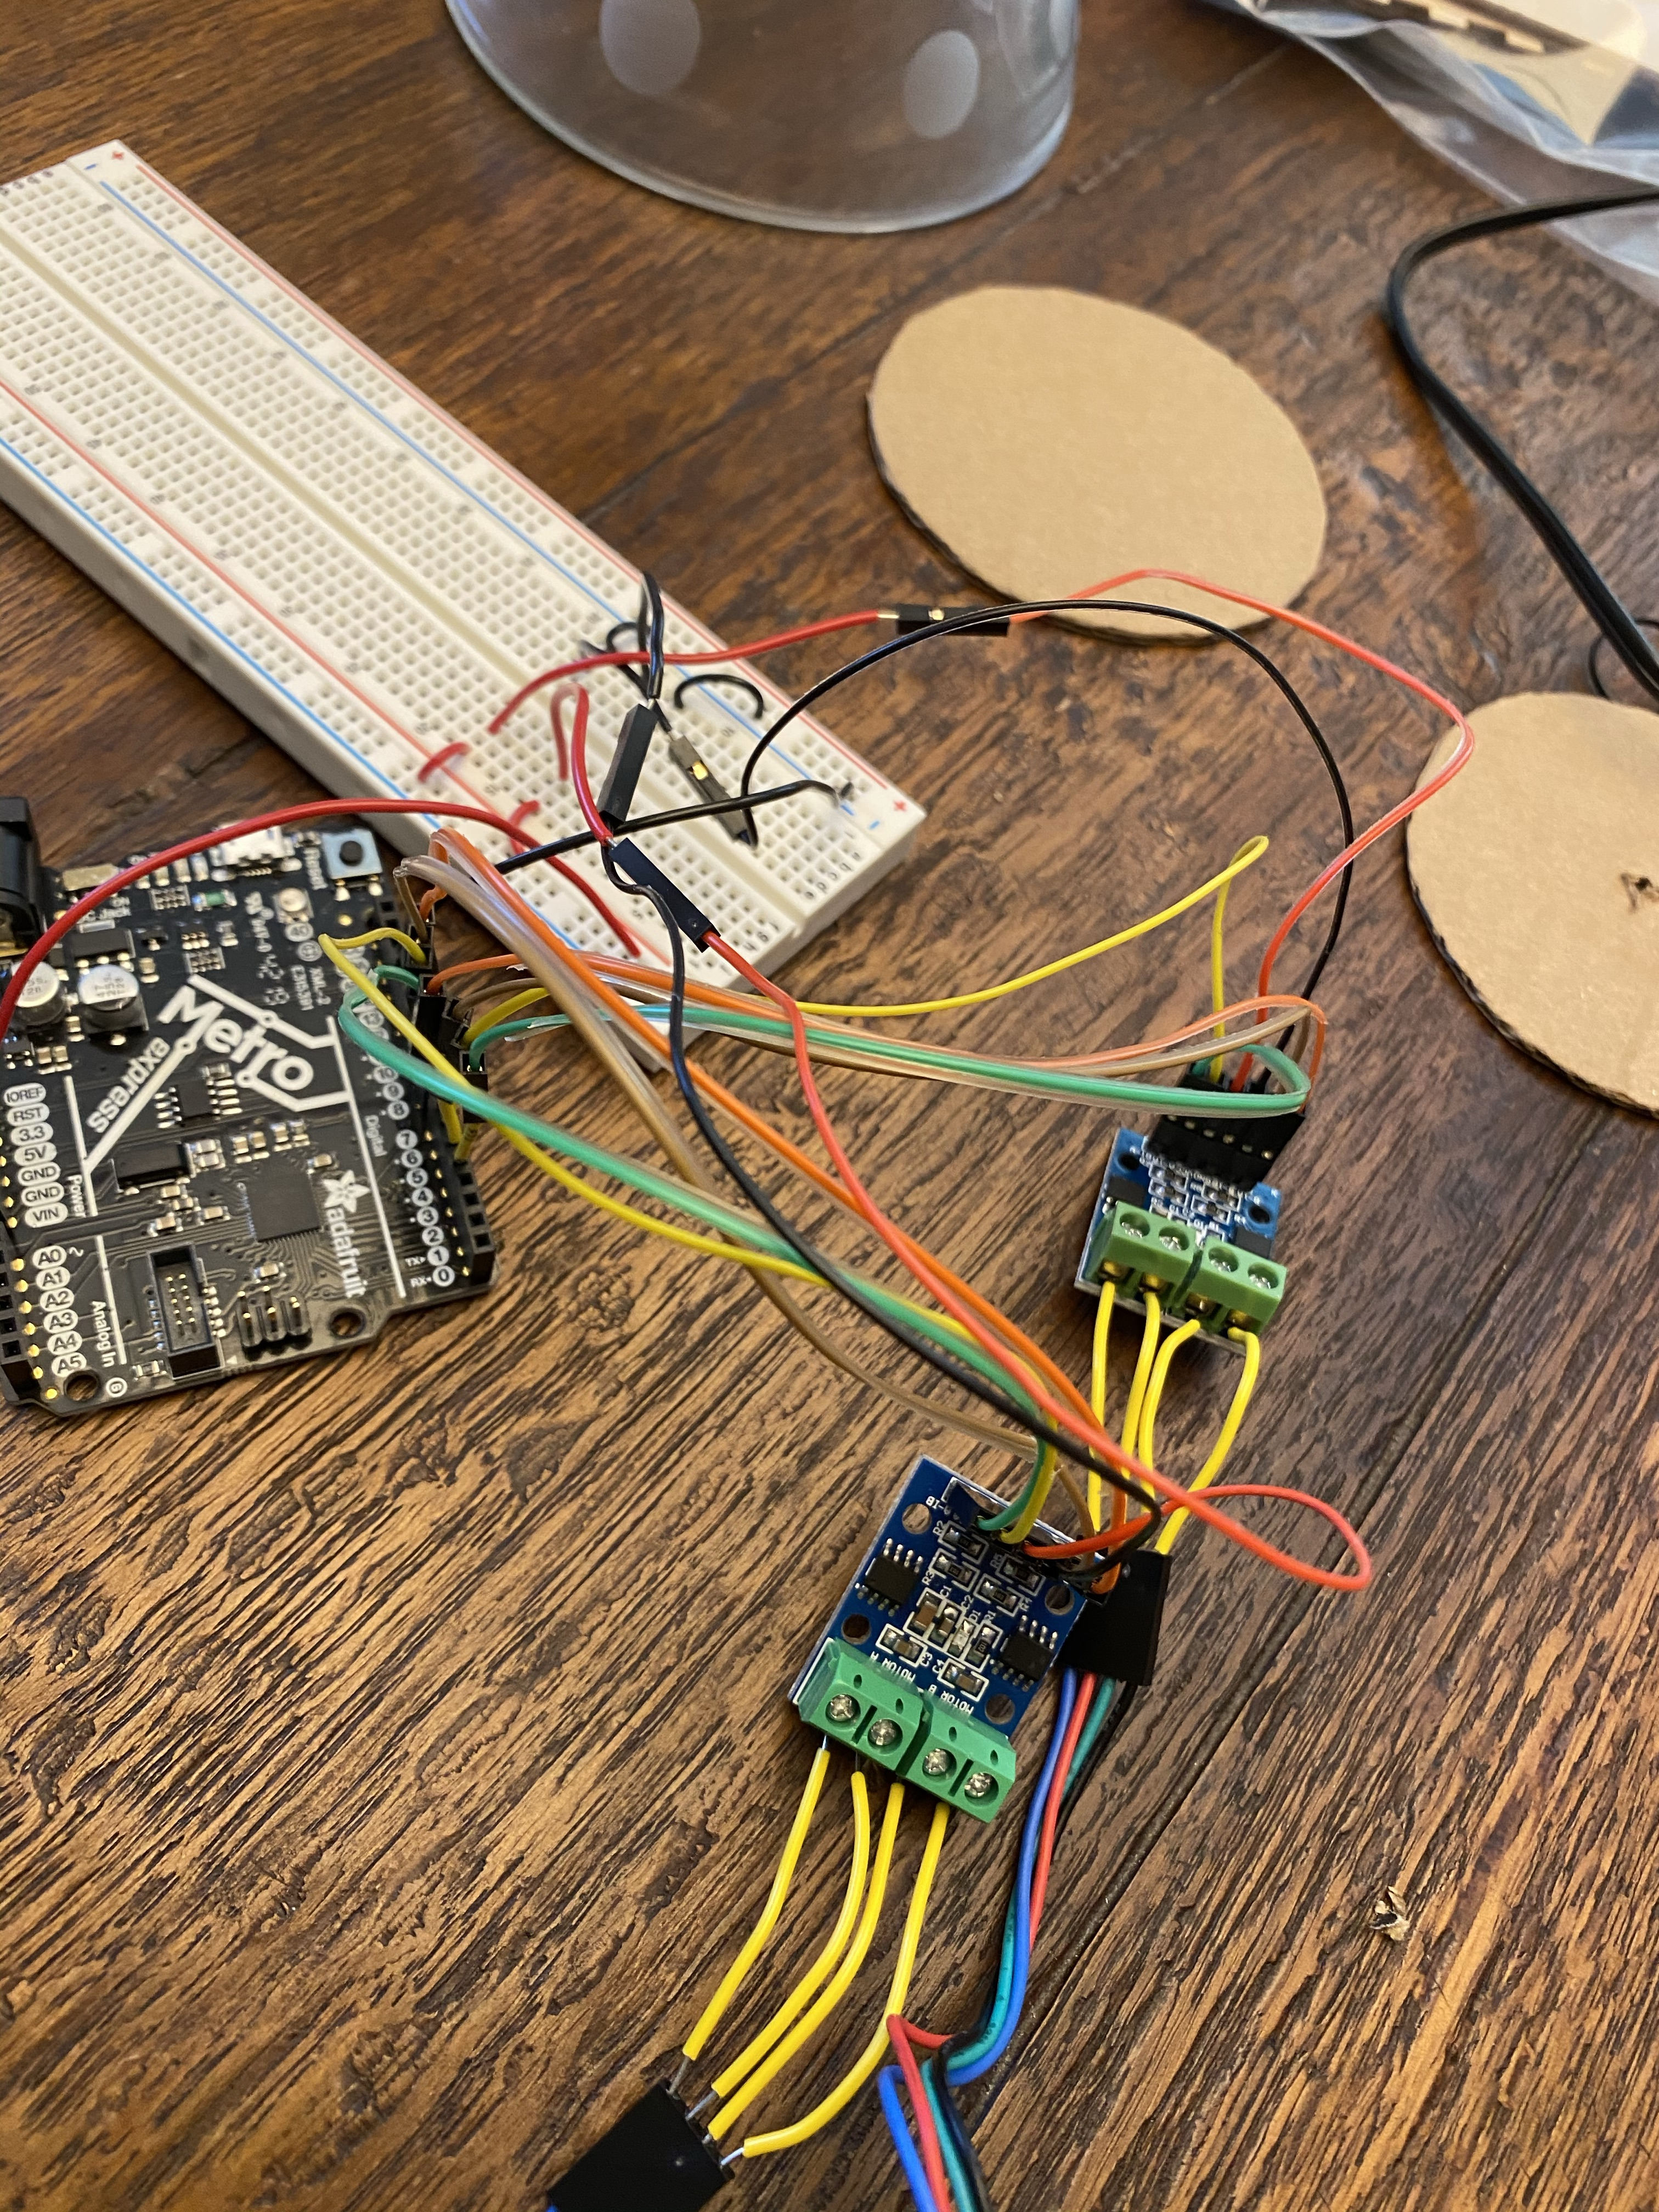
The first thing I did was make a circuit consisting of of 2 stepper motors. I used Mr. Hart's stepper motor tutorial that our instructors provided to figure out how to wire the motors, and then used a breadboard to run both at the same time. The circuit ended up looking like this:
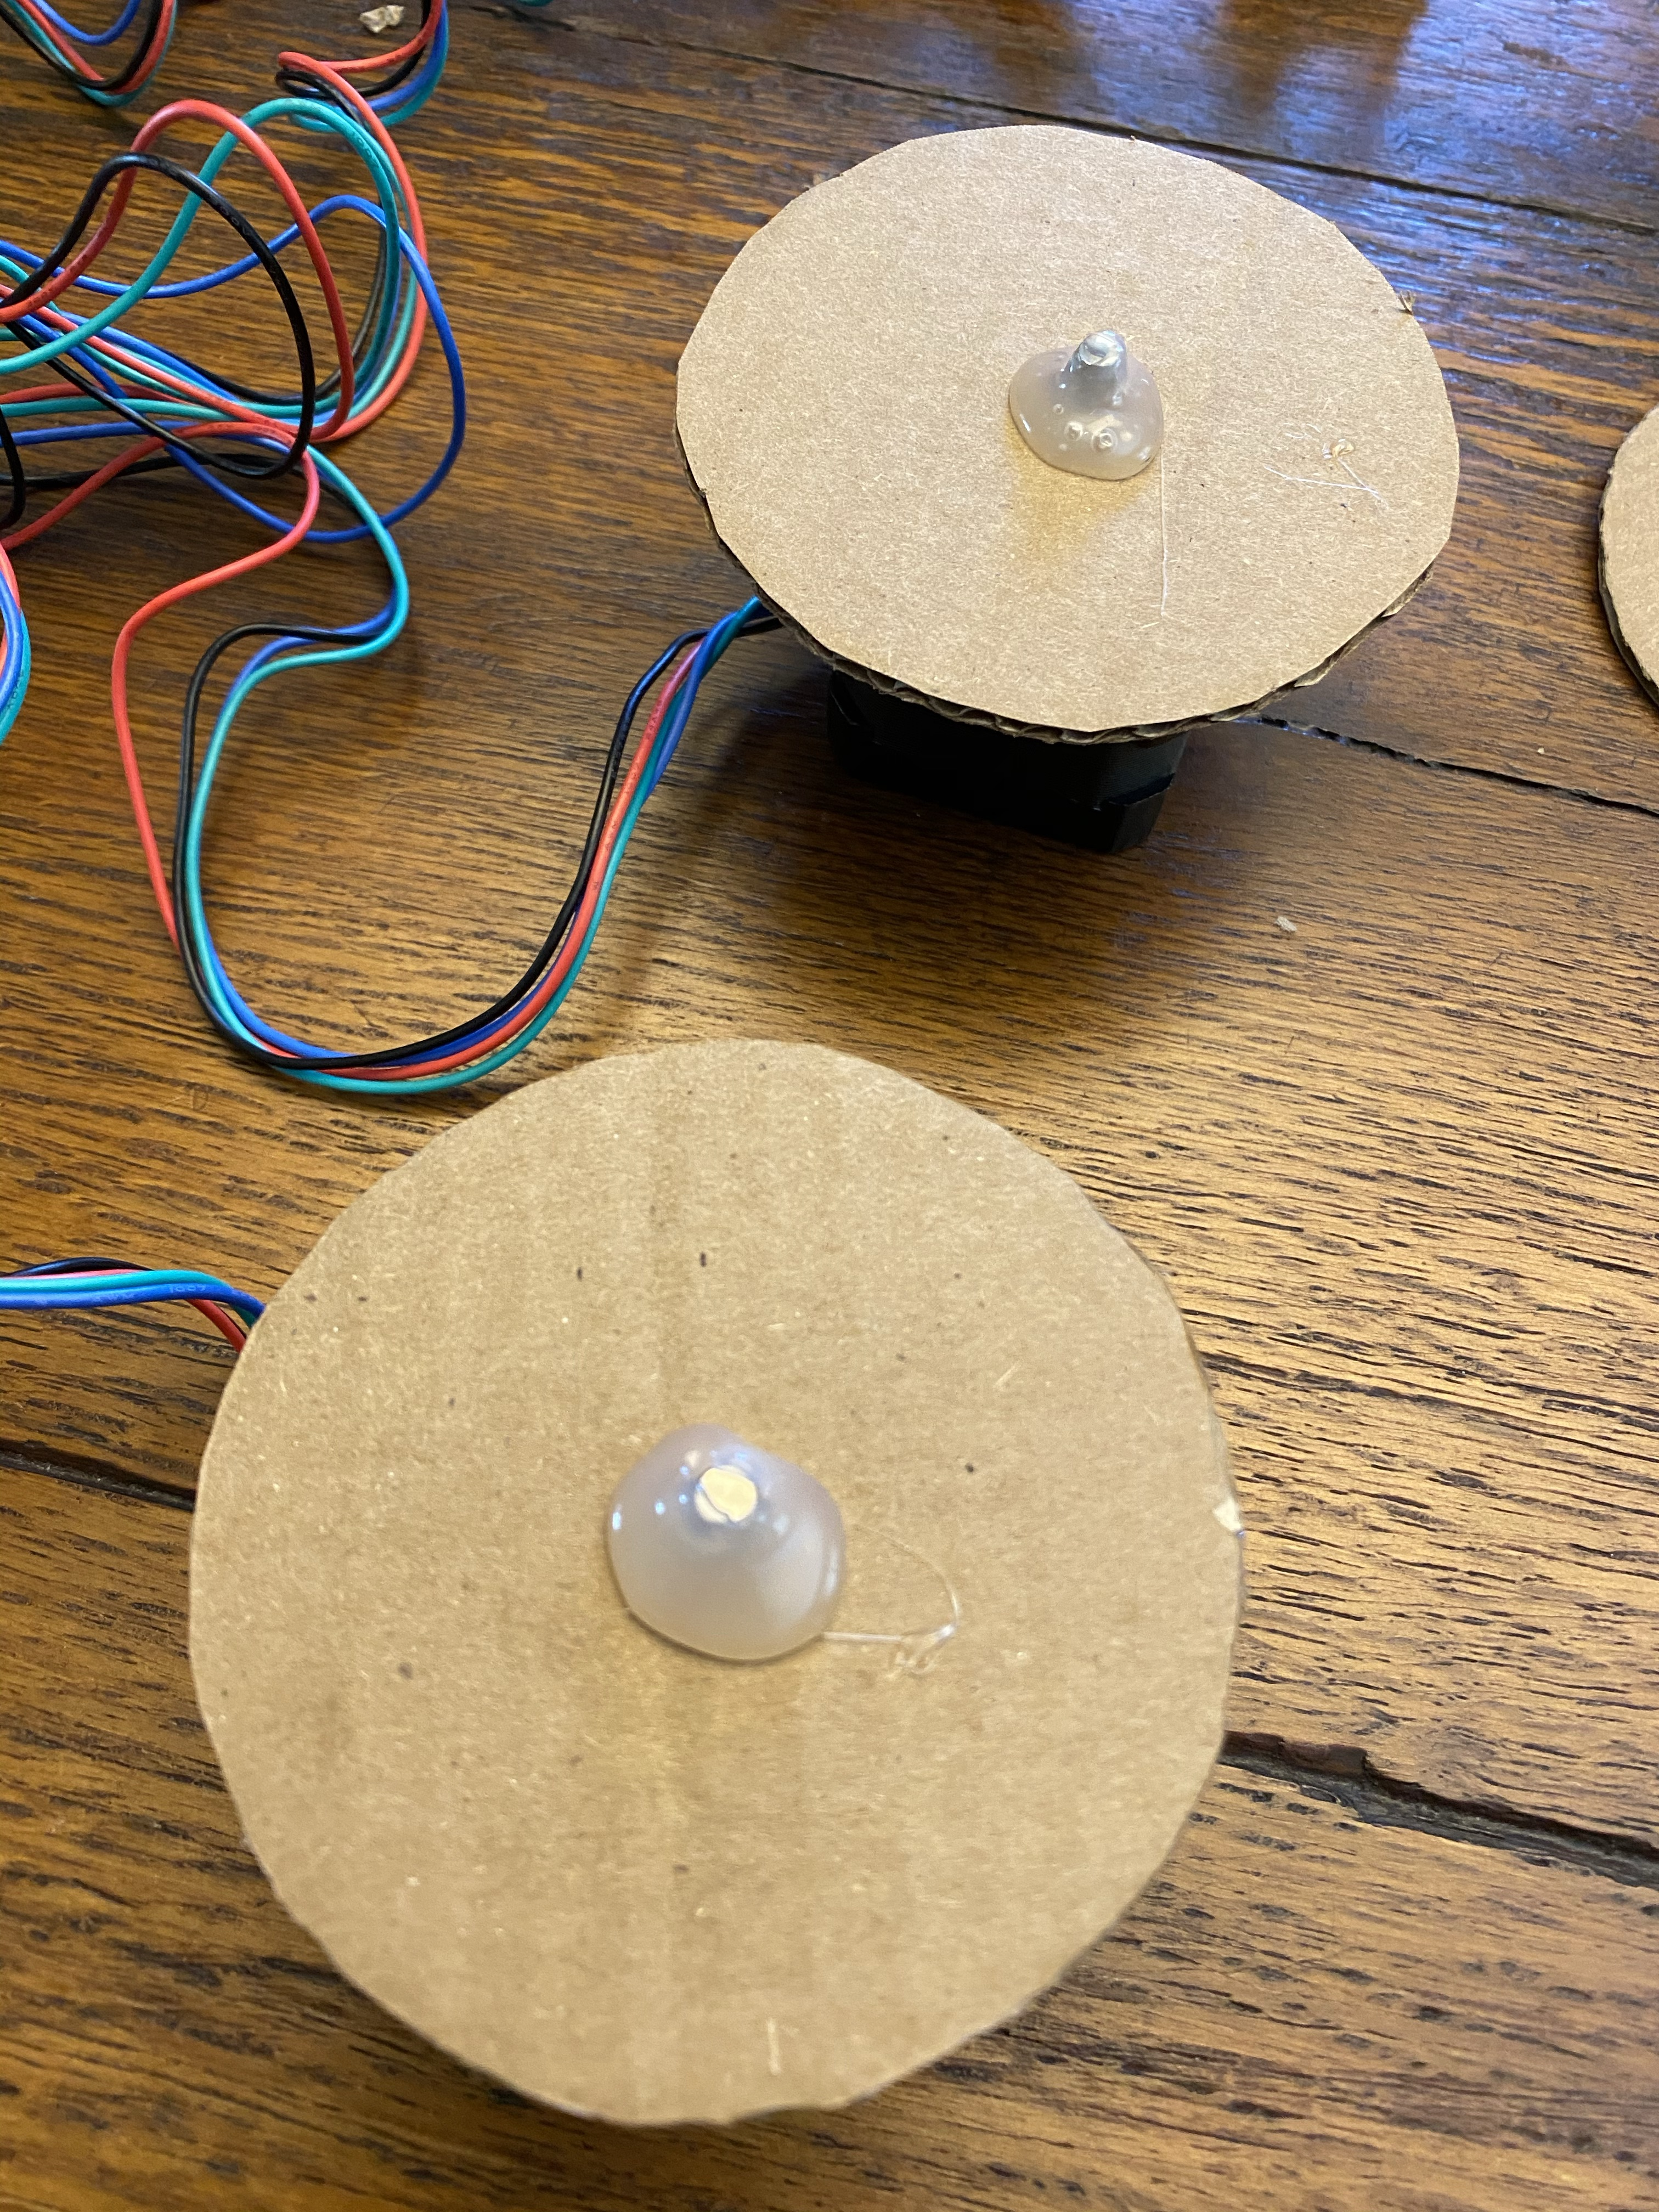
After setting up the circuit, I moved on to making the wheels. To do so, I used a pair of calipers I found in the storage room of my house to trace four circles of 8 cm diamater on a piece of cardboard. Once I cut the circles out, I made a small hole the center of each with my screwdriver and then pushed two onto the motors to make the hole big enough to work with a motor. I then had to put two wheels onto the stepper motors. To make sure the wheel was straight on the axle, I cut out two small squares of cardboard per wheel and put them on the motor first. I then placed the wheel on top and hot glued it to the axle using the new hot glue gun that I got. The wheels and motors ended up looking like this:
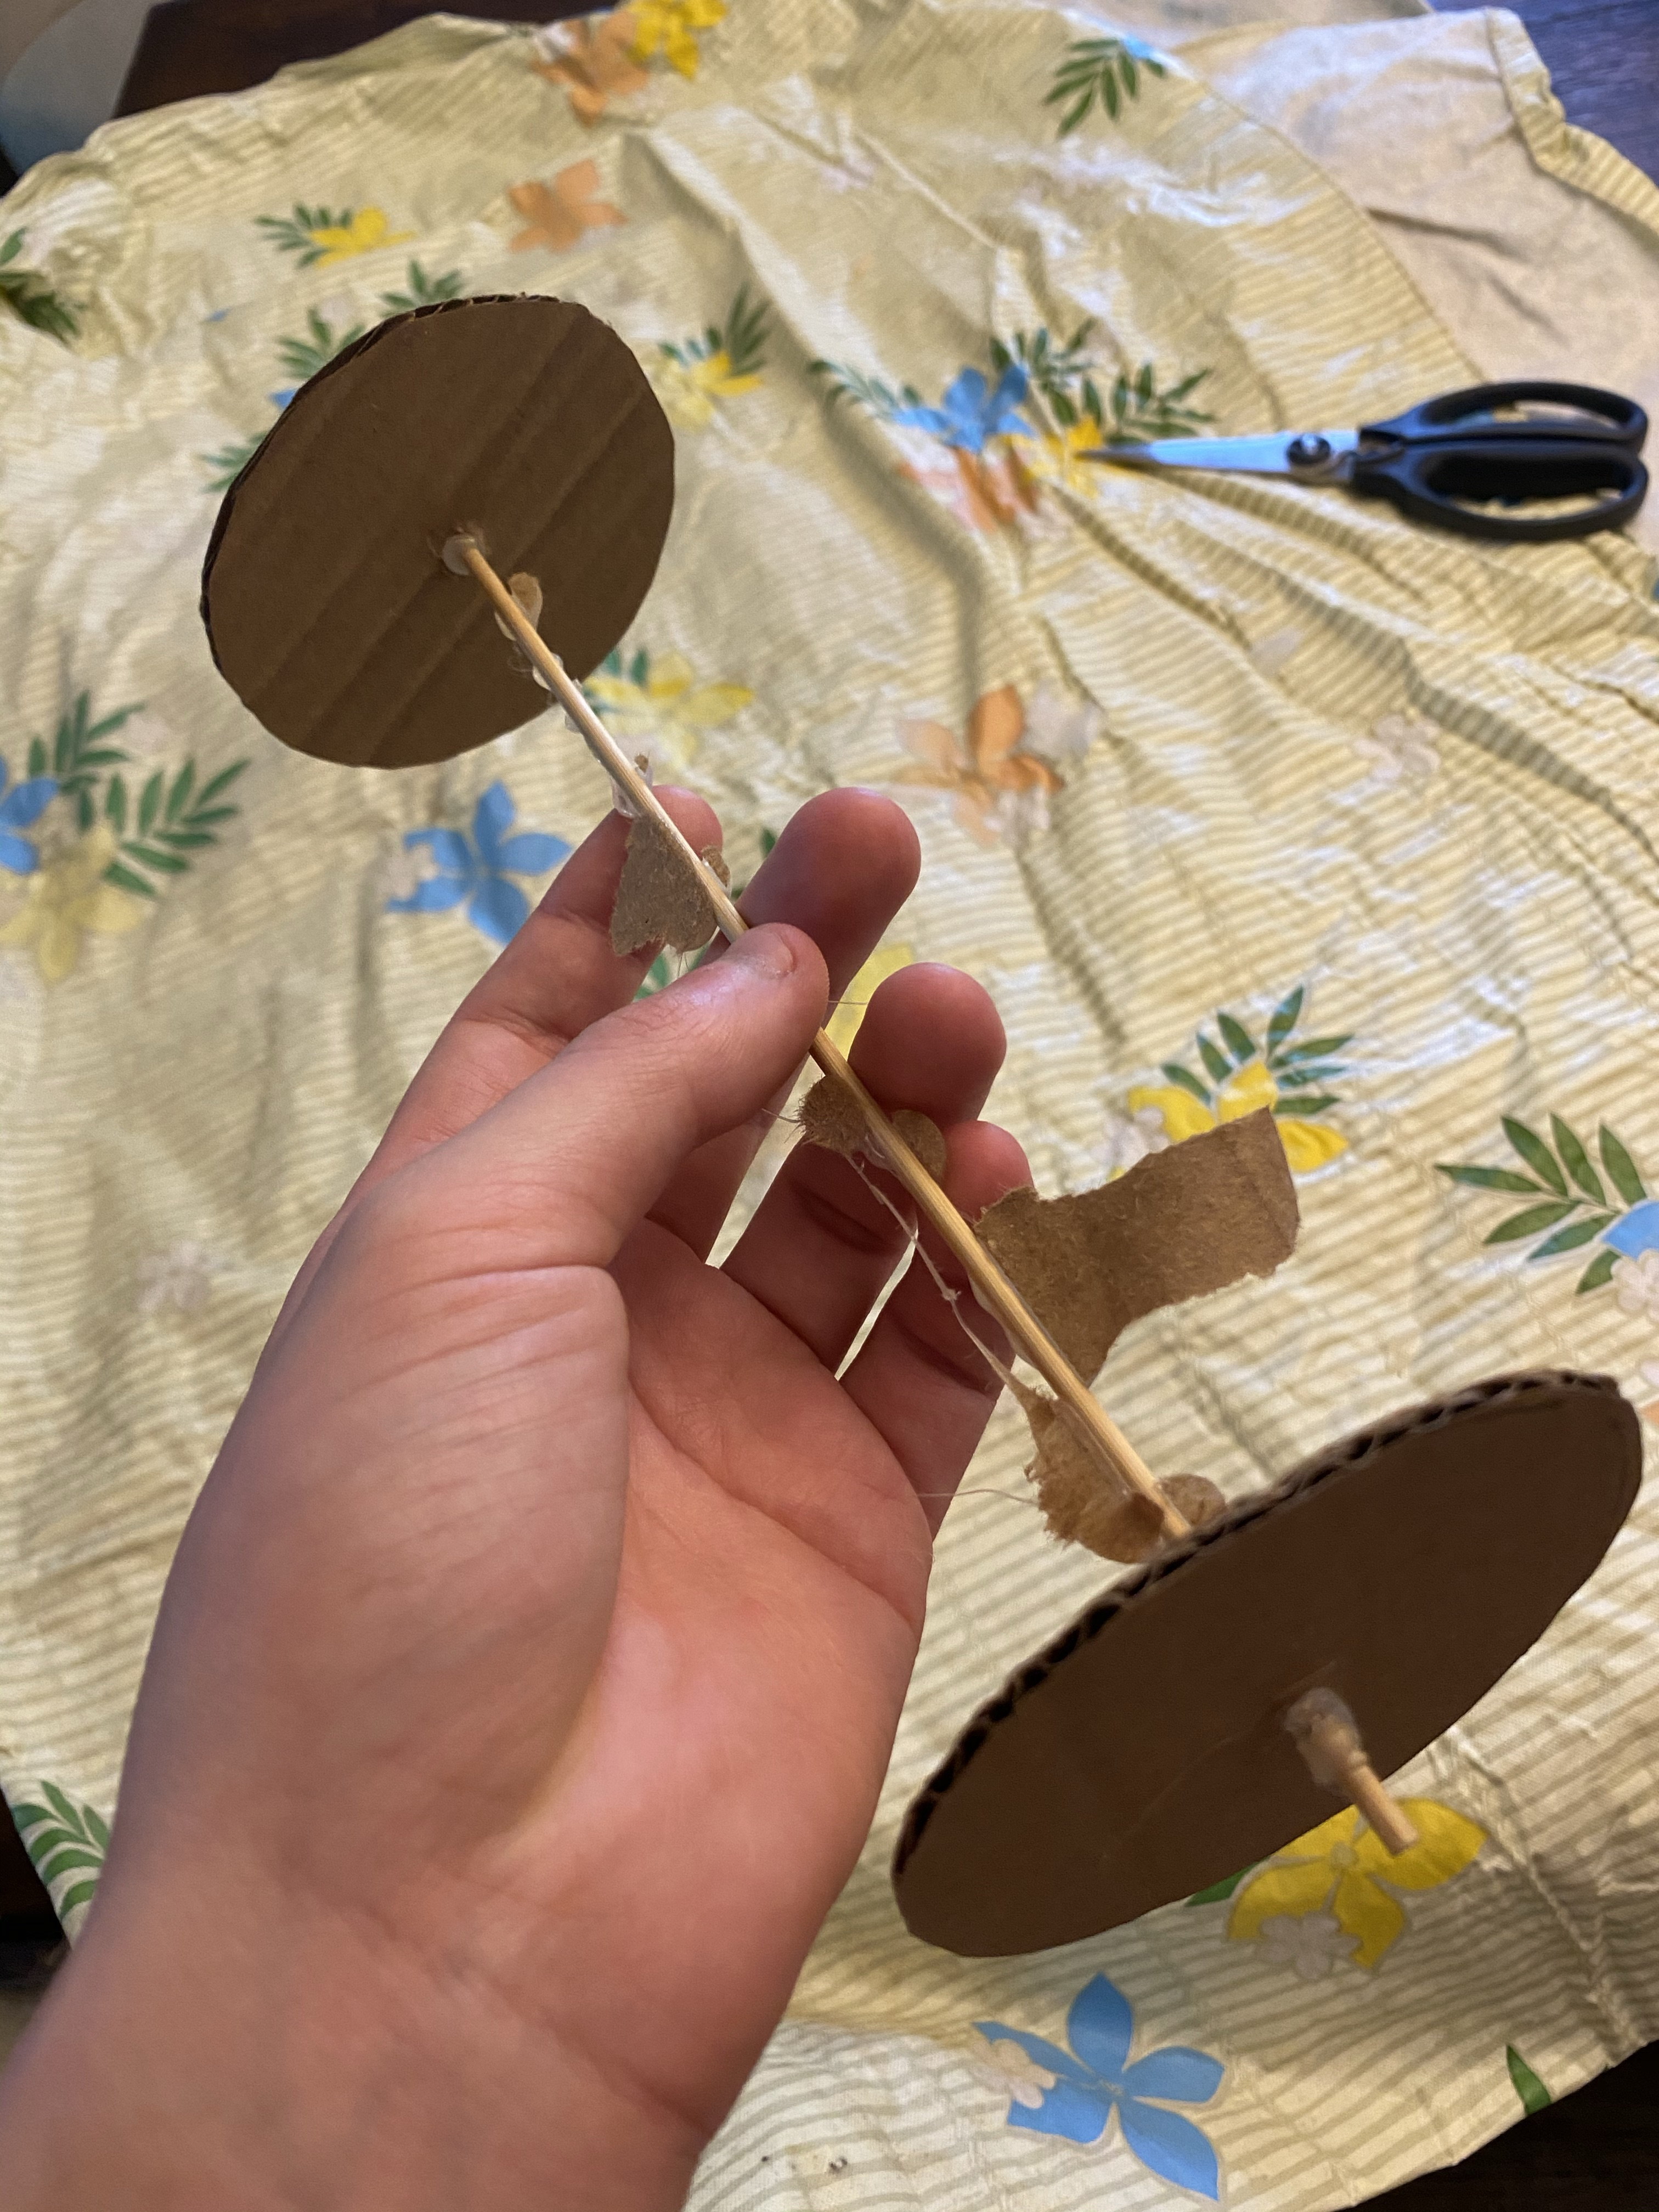
After testing to make sure the wheels spun, I moved on to building the actual car. I first cut out a sheet of cardboard to act as the car body. I then cut out two squares of cardboard for the motors to rest on. I used the hot glue gun to attach the squares to the body, and then did the same for the motors to the squares of cardboard. Once that was all attached, I reached my first major problem: attaching the back wheels in a way that they would actually spin. My first attempt was to hot glue the axle (bbq skewer stick) to the body itself and put glue around the wheels so that they could spin but not move, as there would be glue on either side. The issue with this was that the wheels still had some room between them and the glue, so it was very wobbly, and I had to rethink my idea. The original, failed, back wheels looked like this:
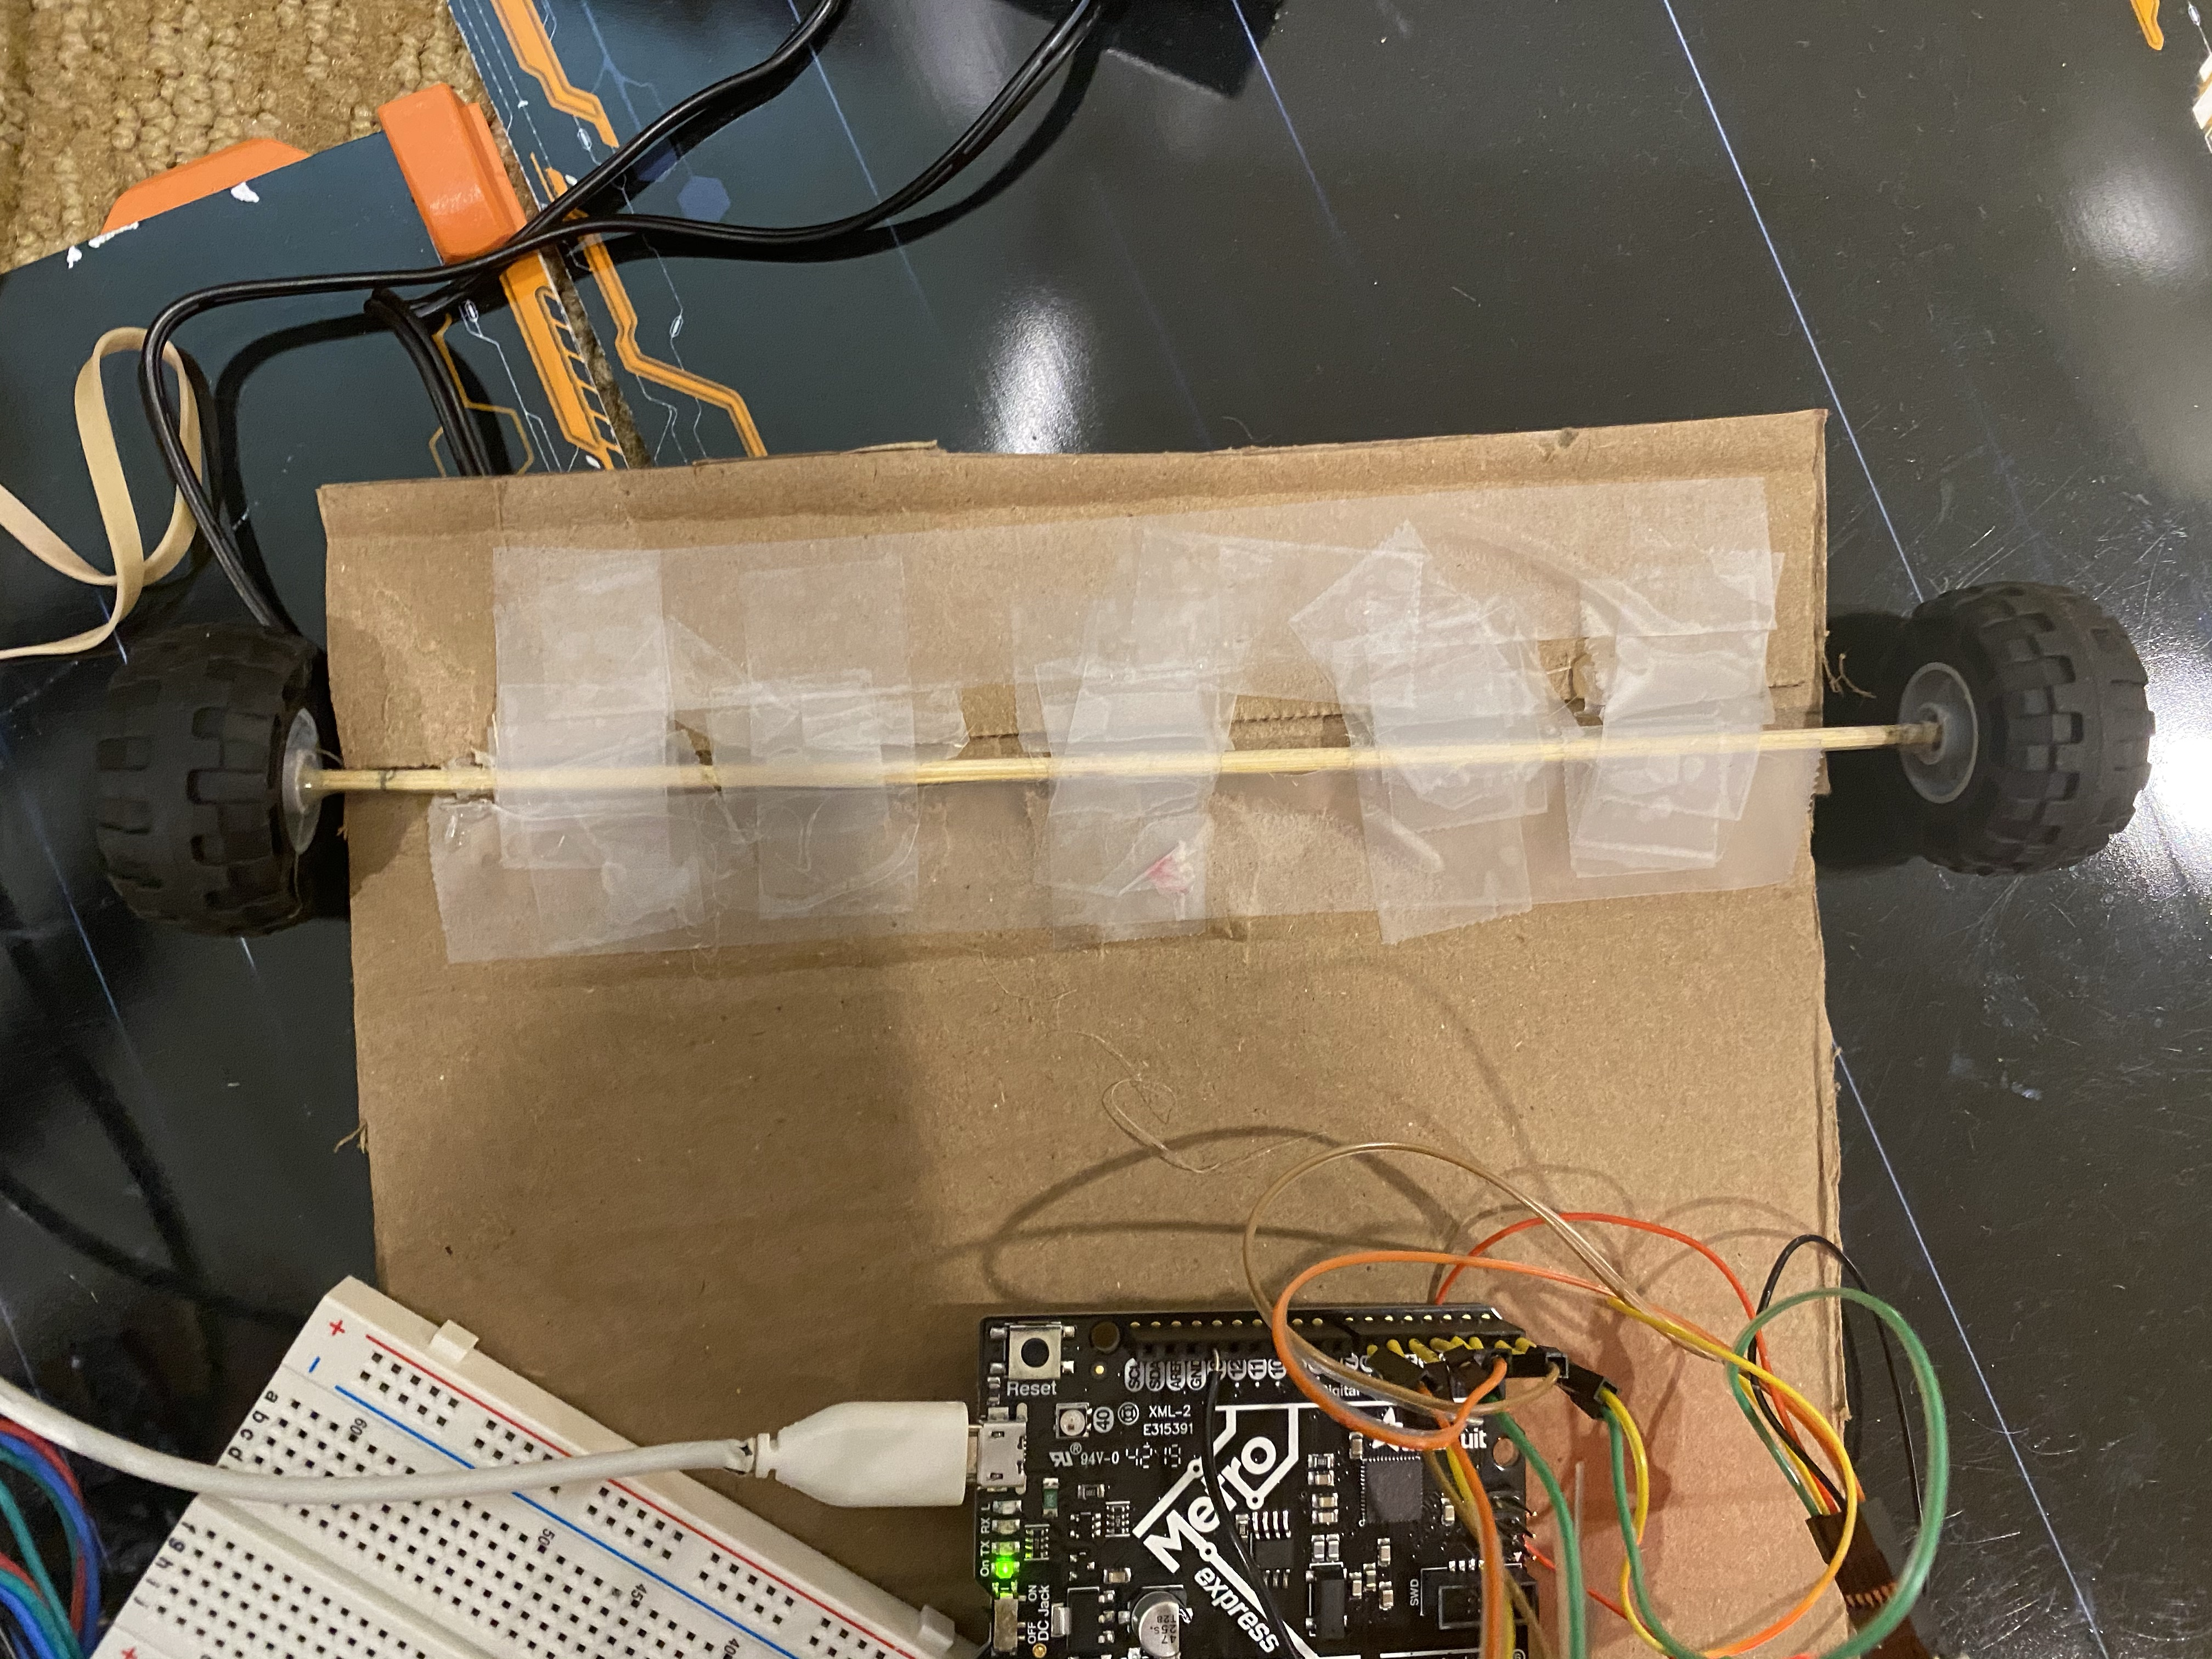
After failing the initial back wheel design, I had to rethink my idea and try again. I decided to make it so that the wheels were stuck on the axle but the axle itself could spin. I used the Lego wheels from our kit and put hot glue in the middle hole. I then stuck the axle into the glue and let it dry so that the axle would stay stuck inside the wheels. Once the wheels were connected, I had to get the axle to stay on the cardboard while still being able to spin. To do so, I made double sided tape but instead of both sides being sticky, both were smooth. However, the top piece was slightly longer, allowing it to stick to the cardboard. That way, there was little room for the axle to move around but it could still spin without flying off. It ended up looking like this:
At this point, I had finished the entire body, and it was time to move on to programming my car.
Section 2: Programming
Now it was time to do the programming. I wanted to make my car unique programming-wise, so I decided to make two functions: one that would drive the car forwards or backwards a given number of cm, and another that would turn the car left or right a given number of degrees. First off was the drive() function.
Above my setup function, I defined some variables that would be crucial to my drive function. They can be seen below. One thing, I had no idea how to do pi in C. In Java it's just Math.pi(), but that doesn't apply to C. So I did some research and found this site that explained that I could get pi by writing M_PI
      const int stepsPerRevolution = 200;  //200 for our steppers.
      const int wheelRadius = 4;    //Wheel radius is 4 cm
      const float wheelCircum =  2 * M_PI * wheelRadius;    //Wheel circum is 8pi
      const float cmPerStep = wheelCircum / stepsPerRevolution;
Based on this information, I figured out that with my wheels that were 8 cm in diameter, each step moved the car about 0.1257 cm. Now it was time to write the drive function. The function passes in a parameter of desired cm for the car to travel. It then calculates the number of steps needed by dividing the desired cm by the cm traveled per step. It then assigns the stepsTaken variable to 0, as there haven't been any steps taken before the wheel turns. It then prints the number of steps needed to the Serial monitor so that I can see what's supposed to happen. Then, while the stepsTaken is less than the needed steps, the wheels turn 1 step and then delay for 1 ms. The reason they only turn one at a time is because the Stepper.step() function is blocking according to the Arduino documentation. If the desired cm is greater than 0, which is forwards, Stepper1 (left wheel) steps -1, while Stepper2 (right wheel) steps 1. They are opposite because the motors are on opposite sides of the car and are therefore facing opposite dirctions. If the cm is less than 0, Stepper1 steps 1 and Stepper2 steps -1. The whole function looks like this:
      void drive(int cm) {
        int steps = (int) (cm / cmPerStep);   //Number of steps is the desired CM divided by the CM per step
        int stepsTaken = 0;   //Before it drives, it's taken 0 steps

        Serial.print("Steps Needed: ");
        Serial.println(abs(steps));

        while (stepsTaken < abs(steps)) {
          if (cm > 0){
            Stepper1.step(-1), Stepper2.step(1); //First motor is negative for forward since it's facing the opposite direction of the other motor
            delay(1);
          }

          else if (cm < 0){                      //else if, not else, because it shouldn't do anything if it's 0
            Stepper1.step(1), Stepper2.step(-1); //First motor is pos for backwards
            delay(1);
          }

          stepsTaken++;
        }

        Serial.println();
      }
After writing this function, I moved onto the turn() function. This function takes a certain number of degrees and turns either left or right. Just like with the drive function, I had to make some variables above the setup function. They can be seen below.
      const float distWheelToWheel = 20.0;    //Distance between each wheel, used for calculating arc length in turning
      const float wheelToWheelCircleCircum = M_PI * distWheelToWheel;
Once I had these variables defined, I moved onto the function. I decided to make the point of rotation the midpoint between the wheels, so I knew ahead of time that both wheels would be turning. I knew that I would have to program it to move a certain distance, in this case an arc length along an imaginary circle between the wheels (hence the variables above). I haven't done Geometry in over a year so I did some quick reading here to refresh myself on how to calculate the arc length of a circle. With that information, I started writing the function. It first calculates the arc length in cm along an imaginary circle between the two wheels. It then converts that to steps, much like the drive function. However, this is the total steps, ie. if only one wheel moved this would work. However, since both wheels are turning, I realized I had to divide this number by two to get the steps per wheel. It then mimics the drive function, assigning stepsTaken to 0 and printing the required number of steps. Next, there's a similar while loop to the drive function. The difference is that if turnDegrees is greater than 0, both motors step -1, and if turnDegreees is less than 0, both step 1. This time, they're both either pos or neg because it's turning; the wheels should be spinning in opposite directions. Here's the final function:
      void turn(int turnDegrees) {
        float arcLengthCM = ((float) turnDegrees / 360) * wheelToWheelCircleCircum;
        int steps = (int) (arcLengthCM / cmPerStep) / 2;  //Divided by 2 since each wheel is moving, so 2 wheels need to sum to a set num of steps
        int stepsTaken = 0;   //Before it drives, it's taken 0 steps

        Serial.print("Steps Needed (Per wheel): ");
        Serial.print(abs(steps));
        Serial.print(", Total Steps: ");
        Serial.println(abs(steps * 2));

        while (stepsTaken < abs(steps)) {
          if (turnDegrees > 0){
            Stepper1.step(-1), Stepper2.step(-1);  //Both pos since the wheels should be spinning opposite directions
            delay(1);
          }

          else if (turnDegrees < 0){
            Stepper1.step(1), Stepper2.step(1);
            delay(1);
          }

          stepsTaken++;
        }

        Serial.println();
      }
With both functions written, there was one more function to make. In talking to Nathan during the lab, he suggested that I make it possible to pass in more than two values to the Serial Monitor so that the car could execute many drive/turn commands consecutively. I started by using Mr. Hart's code on how to pass many values to the Serial monitor and put them into an array. For my code, I first defined an array, driveNums, above my setup function, of length 100. I then made a function called getDriveData(), seen below. It takes each integer value from Serial and adds it to the driveNums array.
      int getDriveData(){
        int index = 0;   // index of data array

        while (!Serial.available() ){;}           //Loop and do nothing until there is a serial character received.

        while(Serial.available()){                //Receive bytes and parse them into integers
          driveNums[index] = Serial.parseInt();   //save these in the driveNums array, which is a global variable.
          index++;
        }

        return index - 1;                         //returns the number of integers received.
      }
Next, I had to write the loop() function. I first assigned the integer numCommands to the value of getDriveData(), which was the length of the array. I then had a for loop that assigned the driveCM to the current array value and the turnDegrees to the following value. It increased 'i' by two at the end of each iteration so that it would always start on the current drive command. The loop looked like this:
      void loop() {
        int driveCM = 0;        //Initial drive forwards/backwards value is 0
        int turnDegrees = 0;    //Initial turn degrees value is 0

        Serial.println("\nRESET");

        int numCommands = getDriveData();           //calls the function that collects serial data.

        for (int i = 0; i < numCommands; i += 2){
          driveCM = driveNums[i];
          Serial.print("Driving ");
          Serial.print(abs(driveCM));  //abs() since it should say 20 cm left instead of -20 cm left
          Serial.print(" cm ");

          if (driveCM >= 0) {
            Serial.println("forwards");       //If driveCM is pos then print how many CM forwards
          }
          else {
            Serial.println("backwards");    //If driveCM is neg then print how many CM backkwards
          }

          drive(driveCM);

          turnDegrees = driveNums[i + 1];

          if(turnDegrees != 0){
            Serial.print("Turning ");
            Serial.print(abs(turnDegrees));
            Serial.print(" degrees ");

            if (turnDegrees >= 0) {
              Serial.println("right");       //If turnDegrees is pos then print how many CM right
            }
            else {
              Serial.println("left");    //If turnDegrees is neg then print how many CM left
            }

            delay(400);
            turn(turnDegrees);
          }

          delay(100);
        }
      }
With these functions made and tested, it was time for testing. But here's where the problems arose.
Section 3: Testing/Troubleshooting
The first issue I had in testing was that whenever I entered values for the car to drive, the wheel would barely spin. I assumed that this was because I was running 5V even though the stepper motors work better with 12V. I tried to fix this using the 9V power supply from out kit, but I had no idea how badly this would turn out. Soon after plugging in the power supply, the motor drivers both got super hot, to the point where I tried to pick one up to fix wiring and nearly burned my finger. Just as I dropped the motor driver, it started smoking and my whole basement smelled like something was burning. I freaked out, and immediately yanked out the power supply. When I tried to re-run the program with 5V, one motor no longer worked. I thought it was a wiring problem, but after a few minutes of checking the wiring, I became suspicious that the 9V had fried the motor driver. I replaced it with my extra and, sure enough, the wheel spun again. So I realized that I'd have to stick with 5V for the remainder of testing, which was already a limitation. But my wheels still weren't spinning as much as I wanted them to. Victoria suggested I try calling the Stepper.step() function directly to see if something was wrong with my drive function, but that still didn't work. I examined all of my code closely and realized I had made a stupid mistake. In the setup() function, I had meant to set the speed of each motor to 50. But I had slipped and added an extra 0 to each, setting the speed to 500. Whoops! Once I changed that, my wheels ran smoothly, at least when I was holding the car in the air (I wanted to test without friction yet). Once I tried testing on the ground, I ran into my biggest problem yet. Since I didn't have any big Lego wheels in my house (which I originally wanted to use as wheels), I had to use cardboard. I hadn't thought of this ahead of time, but they barely got any traction when I tried to run. I assumed this was partly becuase I was on a rug and didn't have any way to increase traction on the wheels. I tried a lot of things to solve this, here's a short list:
- I put rubber bands around each wheel to increase traction
- I tried running it on hardwood floor to see if that would help. It did, but not by much.
- I tried running it on an old Anki Overdrive track. I assumed since that it was designed for cars to run on it, it would work the best. I was right about that, but the results still weren't great. For example, when I tried to drive 10 cm forwards, it only went about 2.5 cm.
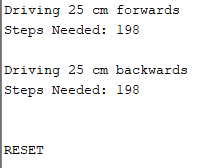
At this point, I searched my house for about half an hour and was unable to find any materials that could work better as wheels. I knew that my whole car worked, at least it would have if I had better wheels, so I was still happy about that. I talked to Nathan, and he suggested that I just figure out ways to prove that my functions worked. I started with the drive() and getDriveData() functions. I made a mark on one of the wheels and told it to drive 25 cm forwards and then 25 cm backwards. Since the diamater of each wheel was 8 cm, the circumference was 8pi, or about 25.133 cm. So 25 cm would be the best test, but not exactly a full turn. I had two ways to test these functions, and I'll show both below. First I could input the following values into the Serial monitor: 25 0 -25 0. These would drive the car forwards 25 cm and then backwards 25 cm (0s are for turn function). Since this is basically two full rotations, the necessary steps for each should be 200, or at least one or two less than than 200. Here's the Serial Output when this was ran:
The next way to test this was using the mark on the wheel that I had made. If my code was correct, this would spin forwards and then backwards, and the mark would end up at the same place at the end of each rotation. I tested it, and it worked! In the video, you can see that it stops a bit short on the forwards rotation. That's only because it's only going 25 cm, which isn't the exact circumference. You can see that after going backwards it stops at the exact starting point. Here's the video:
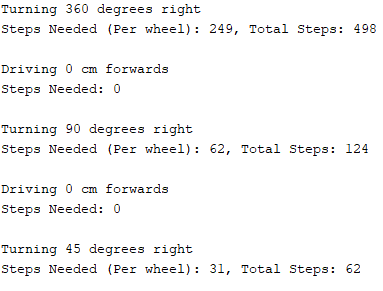
Once I had tested that my drive() and getDriveData() functions worked properly, I moved onto testing my turn() function. I knew I couldn't video this one, since turns don't correspond to exact rotations in the same way that the drive ones do. So I decided to manually remake the circle, figure out the arc length of a few angles, convert that to steps, and then compare it to the Serial output. If my function was correct, my calculated values would match the number of steps in the Serial output. I calculated the number of steps in a google sheet and compared it to the Serial output. The results can be seen below. The Serial monitor steps are slightly lower (but only by 1 or 2) than the sheet, which is simply because of rounding and the number of decmial points used.

Although my car didn't work as well as I wanted, I'm still happy with how I did, especially with the code!
Section 4: What I Learned
Although my results weren't perfect, I learned a ton this week. I didn't want to write a huge paragraph about it all, so here's a list:
- The overall design process: I should have put more thought into considering the consequences of using cardboard as both the body of the car and the wheels. I now know how to better plan ahead of time to avoid trouble later on
- How stepper motors work and how they're wired: I hadn't worked with them before this and it was really cool to see how exact they can be
- Debugging: Working with Nathan and Victoria showed me the many steps of debugging and which things to look for first (ie. misplaced wire, wire popped out, code error)
- Drive Function Code: I learned a lot while making the driving function, mainly how to convert cm to steps based on the diameter of the wheels and how to use that for driving a certain distance. I wrote this whole function from scratch so I had to think a lot about exactly how it would work, and feel much better with this sort of conversion.
- Turn Function Code: Like the drive function, I learned a lot with the turn function. I learned more about calculating the arc length based on the angle and diameter between the wheels. And I was able to use what I learned in the drive function to make coding the actual turning much easier.
- Getting Drive Numbers: I learned a lot about how Serial Input worked, especially with Serial.parseInt(). And I also learned more about C arrays and how to use them in the for loop
Overall, I learned a lot this week, and feel much better with machine building and programming than I did beforehand.